New Google Sites: A First Look
Thoughts on the new Google Sites after a first look – this is long and rambling but hopefully has some useful information as well.
Thoughts Halfway Through Qtr 1
I do think this is going to be a great year!
- I am loving using Google Classroom with 2nd-8th Grade. I’m even thinking of trying it with 1st Grade soon and maybe even Kindergarten before the end of the year!
- Our Middle School Language Arts teacher is also using Google Apps – Classroom & Docs – for essays and book reports this year.
- There are multiple teachers at my school who are working on building their own classroom websites this year.
- II have a 3rd grader who types 63wpm! I had nothing to do with this but it is inspiring others to work on their keyboarding skills.
- 1st Grade had the chance to work with Bee-Bot last week and I’m looking forward to more work with robots and coding coming up.
- I’m going to have the opportunity to present and share at quite a few tech events in the next couple of months.
How’s your year going so far?
#notatiste15 – Creating Ribbons
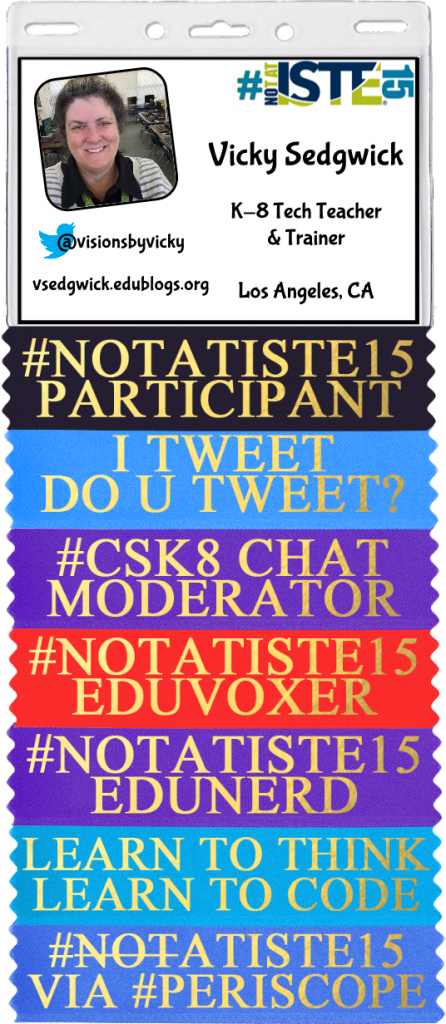
Again this year I am not at ISTE and I am participating in the #notatiste15 community on Google+ and Twitter. One of the fun things we do as a community is make our own badges complete with ribbons because if you’re at a conference or even not at a conference, you need badge, right?
Here’s mine so far this year:
The Google+ community can participate in the challenges that Jen Wagner has put together and there are even prizes! This year, one of the challenges is to create a ribbon and share it with the community. I use Photoshop and this template to create the ribbons but a lot of people don’t have Photoshop so how can they create and share ribbons? There are a lot of ways this could be done even without Photoshop and here are a few ways to try this online.
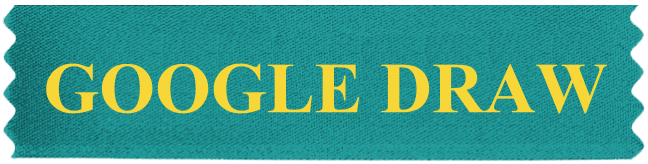
GOOGLE DRAWINGS:
Use one of the ribbons found in the #notatiste15 Badges & Ribbons Folder and use Google Drawings to create a ribbon. You can recolor the ribbon using Image Options on the ribbon and then select a Gold color for the text. The standard ribbons (and this one) use the Times New Roman font in Bold and all upper-case letters. You can then use the File / Download As / and choose PNG (to keep the background behind the ribbon transparent) to save your ribbon as an image to share.
Another option in Google Drawing is to create the text somewhere else and combine it with a ribbon in Google Drawing. For this option, I used the Online Gradient Text Generator at Picture to People and then instead of entering text in Google Drawing, I inserted the text image on top of a ribbon and sized it to fit on the ribbon.

One note on Google Drawing, you should resize the canvas (use the 3 lines on the bottom right) to fit to the ribbon so you don’t have a huge image with a lot of blank space with a ribbon in the middle somewhere.
LUNAPICS:
Download one of the ribbons found in the #notatiste15 Badges & Ribbons Folder and upload it to Lunapic. You can use the Adjust / Adjust Colors and/or Adjust Light Levels options to change the color of the ribbon. Then, use the Draw / Text Tool to enter the text. There are lots of font options though I don’t know that Times New Roman is one of them. You can set a solid color by entering a hex code in the Color box – #CCAC00 is a good darker gold color and #FFD700 is a good lighter gold color. The fun thing with Lunapic is that it has a Gold Glitter option under Pattern (that’s what I used) and it even creates an animated GIF but it won’t be animated if you add it to other ribbons and the badge. Use the Save To Your Computer option to save your ribbon as an image to share.

PIXLR EDITOR:
Again, download one of the ribbons found in the #notatiste15 Badges & Ribbons Folder and then use the Open Image From Your Computer option in the Pixlr Editor to upload the ribbon for editing. You can use Adjustment / Hue & Saturation with the Colorize option checked to change the color of the ribbon. Then use the Text option on the Tools Palette to add your text. This will create the text on a new layer and you can play with options for the layer to get a more gradient gold look to your text. Again, the hex colors of #CCAC00 (for a darker gold) and #FFD700 (for a lighter gold) are good places to start with the color for the text. Use File / Save to save your ribbon – the defaults for a transparent PNG and full size are good.

PICMONKEY:
Again, download one of the ribbons found in the #notatiste15 Badges & Ribbons Folder and then click Edit on PicMonkey to upload the ribbon for editing. You can use Basic Edits / Color and then play with the Saturation and Temperature sliders to recolor your ribbon, if desired. Use the Text Option (Tt) and then click Add Text to insert a text box. There are lots of fonts and you can upload your own. Times New Roman is an option on PicMonkey. As on the other sites, the hex colors of #CCAC00 (for a darker gold) and #FFD700 (for a lighter gold) are good places to start with the color for the text. Use the save option to save your completed ribbon to your computer.

Just a few of many options available for adding text to the ribbons and even changing the ribbon colors. As you can see from the above examples, getting the text to be shiny is what’s tough to do. If you’re interested and you don’t have Photoshop, check out SumoPaint or download and install GIMP and check out this tutorial.
How Can I “Scratch” on an iPad?
At my school, coding is done during classes in the Computer Lab which means it’s typically done on desktop computers. As I have mentioned in the past, my students often use Scratch to create games and to show what they know in other curricular areas. I do have a couple of iPads and a few Android tablets that I can and do use with students. For events like the Hour of Code, I will also sometimes borrow tablets from parents for student use. I am always on the lookout for coding apps on tablets and mostly on iPads because that’s what I can usually borrow.
I also do presentations and training sessions on coding at tech fairs and conferences. I always say that coding can be used across the curriculum to let students show what they know using code and I firmly believe this is true. In order to use coding across the curriculum, it is helpful for coding apps (and websites) to allow students to:
- Tell stories which means sprites (characters) must be able to be customized and must be able to interact with other sprites (characters)
- Create quizzes (and games) which means there should be a way to notify if a question is answered correctly or not or if a game is won or lost; often this means a way to keep score
- Use math calculations
- Draw pictures with code
- Import custom images and sounds
Since many schools these days have 1:1 iPads, I am often asked about block-based coding on iPads. Okay, to be honest, the question I am usually asked is, “Can I run Scratch on the iPad?”
Unfortunately, since Scratch is written in Flash, it doesn’t run on the iPad or most other tablets. There are other block-based coding options that run on the iPad (and some on Android tablets, as well) but none I have found have all of the capabilities that Scratch does for creating cross-curricular projects.
Here are some block-based coding apps that I use and recommend. These all let students create projects starting with a blank canvas:
Do you have a block-based coding app or website (that runs on the Safari or Chrome browser on an iPad) that you feel is a perfect replacement for Scratch on the iPad? Please share!
Hosting a website on Google Drive
In past years, I have had students create a website using HTML and CSS and then upload their site to a folder on Google Drive. The directions that I had in place for this do not work with the new Google Drive but it is still possible to do this:
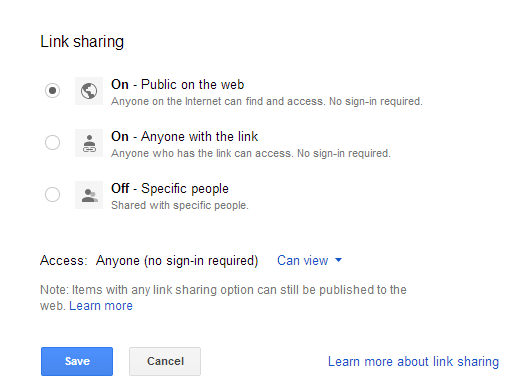
- Create a folder on your Google Drive and publicly share it. I don’t think this works with anything but publicly shared folders but you could try it and see.

- Upload the HTML, CSS, image files, etc. into the folder created. Do NOT convert the files!
- Copy the ID from the link shown for the folder; i.e. https://drive.google.com/folderview?id=0B9SpIwhzRZ4odF9uVUdNZzRYcU0&usp=sharing, you would copy the part after id= and before &usp=sharing.
- The website would be located at http://googledrive.com/host/ID_copied_in_Step3/index.html. For example, the “Hello, World” site for the ID above, is located at http://googledrive.com/host/0B9SpIwhzRZ4odF9uVUdNZzRYcU0/index.html If the main page of your website is something other than index.html, this should be changed in the link.
As you can see, the link to the site is long and not easy to remember so I usually have students use a URL shortener for sharing. Google’s URL Shortener is a good choice especially for Google App schools because you can track how many times the link is used using your Google Apps account. I also recommend TinyURL because students can create a short URL that includes a custom name that makes sense without creating an account.