Yes, You CAN Install iMovie on Older iPads!

We had some iPads donated that won’t update to iOS11. They’re fine for what we need but I really wanted to install iMovie on them. I thought this was a lost cause because I kept getting errors trying to install it since the latest version of iMovie requires iOS11 and the Apple ID I was using had not previously installed iMovie. Through a bit of research and some trial and error, I discovered that, yes, it IS possible to install a prior version of iMovie on these iPads!

Do you want to know how?

  1. Select iMovie from the App Store and Buy it. It will act like it is installing but it will fail. I got a message saying that iMovie could not be installed at this time.
  2. Go back into the App Store and into the Purchased options. Click on the Download icon for iMovie. You will get a message that says “Do you want to download the last compatible version? This version of iMovie is not compatible with this device.” Click Download and Voila! iMovie will install!!

I would love it if the App Store would just do this or prompt me when I first buy the app but at least there is a way to get it installed.

Robots: Future Overlords or Devices for Learning?

I had the privilege to guest moderate #TynkerChat on Twitter on March 27th and I thought I’d take this opportunity to answer the chat questions in more depth. It’s hard to share everything in 140 characters!

Why would we want to use robots to teach coding/computer science to students?

There is so much available to teach students coding these days, so why would we spend money on robots when there are free apps or websites available? There’s just something amazing about putting a robot into the hands of a student, whether they’ve had to build the robot or they’re just programming it. Seeing something like a robot do what you’ve told it to do helps students to understand that robots and computers aren’t magic. They need someone to tell them what to do! Also, providing the tactile, physical experience of a robot is a great way to reach many of our learners and it forces them to slow down and think about what they need to do in order to program the robot to do what they want it to do.

What robots are available for student learning and which do you use and why?

There are many options for robots for learning these days and there seem to be new ones every month. Here’s what my students have been using this year. I’m not going to go into detail about how to use these robots – that’s a whole different post!

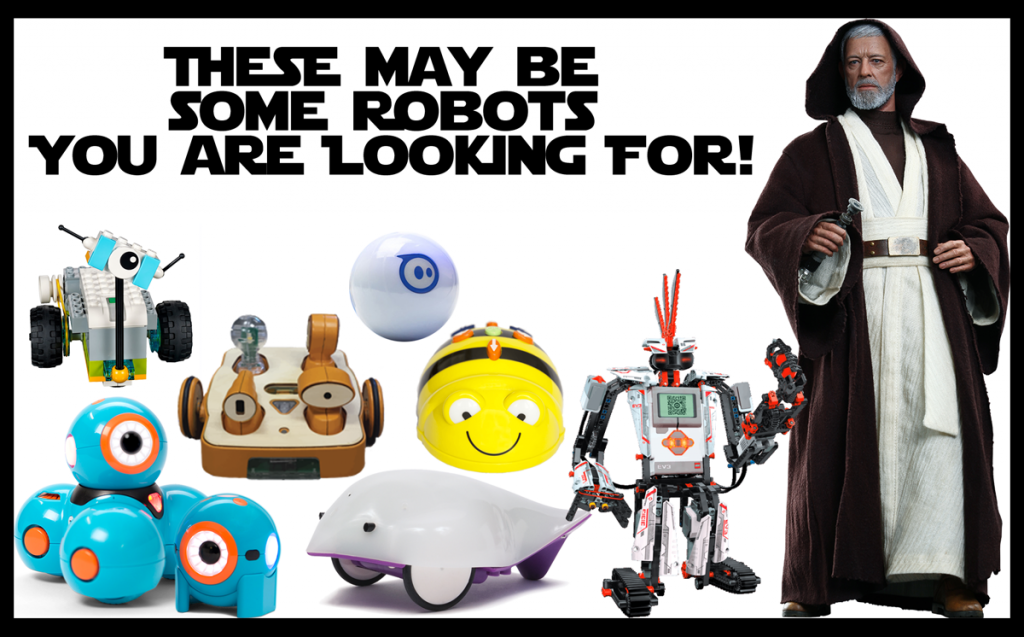
  • Bee-Bot & Robot Mouse: These are perfect for young learners and don’t require any device except the robot. They help to teach directions and sequencing and problem solving and collaboration in a physical way just by pushing buttons on the robot and they can be integrated into any curricular area.
  • Cubetto: I bought this (and I only have one) to try some programming with our preschoolers. I haven’t used it with them yet but my kindergarten students have had fun with it. Cubetto comes with a story book and story mat which is a great introduction to how the robot works. Students program this robot with blocks that fit into control board and no electronic device is needed, so this is a very physical way to write and debug algorithms. If you’re looking for ideas of what to do with Cubetto, there are lots of ideas here.
  • Dash & Dot: Dash and Dot are really versatile and very cute as well. My younger students have used them with apps that let the students “program” the robots by drawing a path for the robot to follow. My older elementary students use the Wonder Workshop coding apps and the Tickle app.
  • Sphero: Some people think of Sphero as only for older students but I have used them with 1st grade through middle school. I highly recommend the Lightning Lab app (you can even export data from your programs on this one!), the Tickle app, and Tynker app for working with Sphero. If you have Chromebooks, you can even program Sphero on those as well. There are a lot of ideas for using Sphero on the Lightning Lab website.

Why these? Well, these are the robots we have and I have found them to be pretty versatile. They let my students learn not only computer science concepts but I can easily integrate them into other curricular areas as well. We also have a couple of mBots and some Lego WeDo that I’m hoping we have time to use this year and if not, there’s always next year! I would really like to get into more building of robots next year so I would love more mBots, more WeDo (original & WeDo 2), and Hummingbird Robotic Kits.

Teachers may often have one or only a few robots. How can they still be used effectively?

First, robots should not be a 1:1 experience. Robots should be used in pairs or small groups. Part of the magic of robots for educators is that students are not only learning how to write and debug programs to control a robot, they may also be learning or reviewing other curricular content, and they are learning to communicate and collaborate with one another and share roles and responsibilities.

For example, when my younger students work with Bee-Bot, they often work in groups of three where one person is the human robot, another is the coder/debugger, and the third is the robot programmer. The human robot actually walks the mat as the robot programmer tells them where to move. As they are doing this, the coder/debugger lays out coding cards or writes the code on an erasable white board. Once the human robot has reached the goal, the coder reads back the code and the robot programmer pushes the buttons on the Bee-Bot to program it. When the robot programmer presses GO on the robot, the coder/debugger keeps track of which command Bee-Bot is on so they can fix the code if needed. Students then switch roles so all students have the chance to perform all roles. For older students, there should also be assigned roles which might be things like the programmer, the robot handler, and the debugger. Again, students would switch roles regularly so all students have a chance to be responsible for all roles.

Even in groups of three, teachers may still not have enough robots for all students to be using them at the same time. Here are some ideas if that’s the case:

  • Use robots in a small group center so that one or two robots can be used for an entire class as they rotate through the center. Yes, even for older students!
  • Have some students using robots while other students are doing “robot programming” on apps and/or websites. It is still a good idea to pair students when they are doing these activities as well. Have one student be the driver (the person at the keyboard or holding the tablet) and the other is the navigator who helps to write the code (but does not touch the tablet or keyboard) and debug any problems. Again, students should switch roles often. I like to have them do this either when they have solved a level (in a puzzle type app) or on a specific time schedule, like every 5 minutes. Some “robot programming” apps and websites are listed below. There are other apps available beyond what are listed here but these should get you started.
    • Bee-Bot Emulator: This is great if you have Bee-Bots because you can often have the students working online doing the same activity as those using robots except the students using the emulator are programming a virtual Bee-Bot. For example, if you are having students program Bee-Bot to the beginning letter sounds of words, you can give both the students working with the real Bee-Bot and the students using the emulator the same picture cards so they can be navigating on a ABC mat to the beginning letter sound in either case.
    • Bee-Bot App: If you have iPads, this is a good app to use when students are working with Bee-Bot since in the app they are also programming a Bee-Bot. Again, pair students and have both a navigator who lays out coding cards or writes the program on an erasable white board as the driver figures out the code in the app. This app does not keep track of the commands that are entered so writing down the program is important in order to debug.
    • Bits & Bricks: If you are using Lego WeDo 2 or if your students just like Legos, this is a great companion website to use since it features Bit the Robot who is very similar to one of the robots you might build with Lego WeDo 2.
    • RoboBlockly: RoboBlockly is a web-based robot simulation environment that lets students program virtual Linkbot and Lego Mindstorms NXT/EV3 robots.
    • RobotMesh Studio: Program a virtual VEX IQ robot called Mimic.
    • NASA Rover: Program a virtual NASA Rover
    • RoboMind Academy: Program Robo through a series of levels.
    • StarWars Hour of Code: Program BB8 and R2D2 through a series of levels and create your own game at the end. Can program either with blocks or Javascript. Really fun to do if you happen to have a Sphero BB8 robot that you can then program with the Tickle app when you’re done.
    • Lightbot: Lightbot has apps available for most devices and a Flash version on the web. All of these feature a small robot that you program through a series of levels.
    • Fix the Factory: This game use Lego Mindstorm robots which go through a series of levels to fix a factory and works on iPads and Android tablets. There is also a web version but it won’t run on the Chrome browser or on Chromebooks.

Considering the cost of robots, how can we help more teachers & students have access to them?

In order to get robots, you may need to do some fundraising. Donors Choose is the most well known option available and is a great one to try if you are a public school teacher. Unfortunately, I teach in a private school so DonorsChoose is not an option for me but here are some crowdsourced fundraising sites that private school (and public school) teachers can try:

Some schools and districts now have robot lending libraries. If yours doesn’t check out the Finch Robot Loan Program and if you’re a member of CUE, check out the CUE STEAMPunk Mobile Labs.

So, are you using robots with your students? Which ones?

#notatiste15 – Creating Ribbons

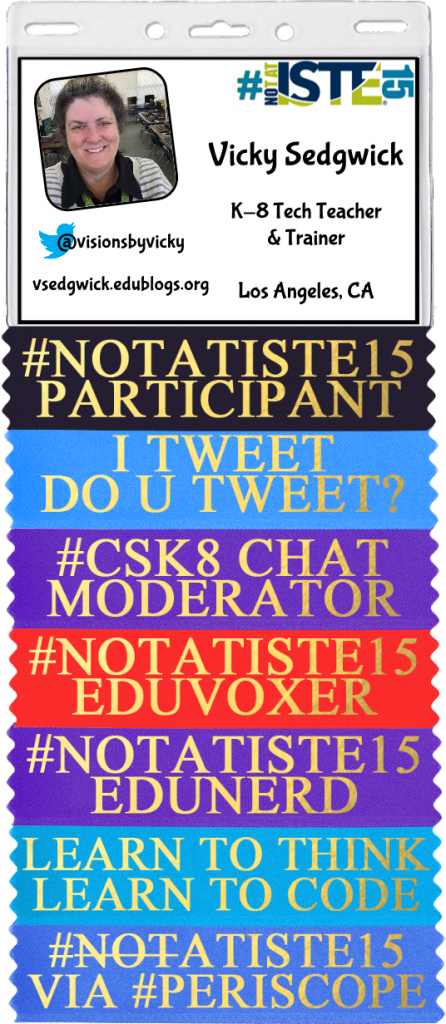
Again this year I am not at ISTE and I am participating in the #notatiste15 community on Google+ and Twitter. One of the fun things we do as a community is make our own badges complete with ribbons because if you’re at a conference or even not at a conference, you need badge, right?

Here’s mine so far this year:
vls-#notatiste15

The Google+ community can participate in the challenges that Jen Wagner has put together and there are even prizes! This year, one of the challenges is to create a ribbon and share it with the community. I use Photoshop and this template to create the ribbons but a lot of people don’t have Photoshop so how can they create and share ribbons? There are a lot of ways this could be done even without Photoshop and here are a few ways to try this online.

GOOGLE DRAWINGS:

Use one of the ribbons found in the #notatiste15 Badges & Ribbons Folder and use Google Drawings to create a ribbon. You can recolor the ribbon using Image Options on the ribbon and then select a Gold color for the text. The standard ribbons (and this one) use the Times New Roman font in Bold and all upper-case letters. You can then use the File / Download As / and choose PNG (to keep the background behind the ribbon transparent) to save your ribbon as an image to share.
Google Drawing
Another option in Google Drawing is to create the text somewhere else and combine it with a ribbon in Google Drawing. For this option, I used the Online Gradient Text Generator at Picture to People and then instead of entering text in Google Drawing, I inserted the text image on top of a ribbon and sized it to fit on the ribbon.
Google Drawing and Picture To People
One note on Google Drawing, you should resize the canvas (use the 3 lines on the bottom right) to fit to the ribbon so you don’t have a huge image with a lot of blank space with a ribbon in the middle somewhere.

LUNAPICS:

Download one of the ribbons found in the #notatiste15 Badges & Ribbons Folder and upload it to Lunapic. You can use the Adjust / Adjust Colors and/or Adjust Light Levels options to change the color of the ribbon. Then, use the Draw / Text Tool to enter the text. There are lots of font options though I don’t know that Times New Roman is one of them. You can set a solid color by entering a hex code in the Color box – #CCAC00 is a good darker gold color and #FFD700 is a good lighter gold color. The fun thing with Lunapic is that it has a Gold Glitter option under Pattern (that’s what I used) and it even creates an animated GIF but it won’t be animated if you add it to other ribbons and the badge. Use the Save To Your Computer option to save your ribbon as an image to share.
ribbon-lunapic-goldglitter

PIXLR EDITOR:

Again, download one of the ribbons found in the #notatiste15 Badges & Ribbons Folder and then use the Open Image From Your Computer option in the Pixlr Editor to upload the ribbon for editing. You can use Adjustment / Hue & Saturation with the Colorize option checked to change the color of the ribbon. Then use the Text option on the Tools Palette to add your text. This will create the text on a new layer and you can play with options for the layer to get a more gradient gold look to your text. Again, the hex colors of #CCAC00 (for a darker gold) and #FFD700 (for a lighter gold) are good places to start with the color for the text. Use File / Save to save your ribbon – the defaults for a transparent PNG and full size are good.
ribbon-pixlr

PICMONKEY:

Again, download one of the ribbons found in the #notatiste15 Badges & Ribbons Folder and then click Edit on PicMonkey to upload the ribbon for editing. You can use Basic Edits / Color and then play with the Saturation and Temperature sliders to recolor your ribbon, if desired. Use the Text Option (Tt) and then click Add Text to insert a text box. There are lots of fonts and you can upload your own. Times New Roman is an option on PicMonkey. As on the other sites, the hex colors of #CCAC00 (for a darker gold) and #FFD700 (for a lighter gold) are good places to start with the color for the text. Use the save option to save your completed ribbon to your computer.
ribbon-picmonkey

Just a few of many options available for adding text to the ribbons and even changing the ribbon colors. As you can see from the above examples, getting the text to be shiny is what’s tough to do. If you’re interested and you don’t have Photoshop, check out SumoPaint or download and install GIMP and check out this tutorial.

Hosting a website on Google Drive

In past years, I have had students create a website using HTML and CSS and then upload their site to a folder on Google Drive. The directions that I had in place for this do not work with the new Google Drive but it is still possible to do this:

  1. Create a folder on your Google Drive and publicly share it. I don’t think this works with anything but publicly shared folders but you could try it and see.
    HTMLTestGoogleDrive-publicshare
  2. Upload the HTML, CSS, image files, etc. into the folder created. Do NOT convert the files!
  3. Copy the ID from the link shown for the folder; i.e. https://drive.google.com/folderview?id=0B9SpIwhzRZ4odF9uVUdNZzRYcU0&usp=sharing, you would copy the part after id= and before &usp=sharing.
  4. The website would be located at http://googledrive.com/host/ID_copied_in_Step3/index.html. For example, the “Hello, World” site for the ID above, is located at http://googledrive.com/host/0B9SpIwhzRZ4odF9uVUdNZzRYcU0/index.html If the main page of your website is something other than index.html, this should be changed in the link.

As you can see, the link to the site is long and not easy to remember so I usually have students use a URL shortener for sharing. Google’s URL Shortener is a good choice especially for Google App schools because you can track how many times the link is used using your Google Apps account. I also recommend TinyURL because students can create a short URL that includes a custom name that makes sense without creating an account.


If I Could Only Use One …

This year in the Computer Lab, all of my classes spent some time learning to code or learning coding concepts. As I look back on what they accomplished and learned and think about what I want to do next year, I had a thought. If I could only use one app/program/website, what would it be? Honestly, if I had to pick only one, it would have to be Scratch.

StM2013-2014Studio

This year, 2nd grade through Middle School used Scratch, among other programs, and I love the flexibility it offers. Here’s some of what my students did in Scratch this year:

Drawing Shapes
Many of the grades created a project that would draw shapes. This was a great project to use for multiple grade levels. 2nd graders could guess and try and when it didn’t work, try again. 3rd graders could think about the math involved and check their guess by multiplying the number of times the loop would repeat by the angle of the turn. 4th graders and above could divide 360 by the number of times the loop would repeat and calculate what the angle of the turn should be. Middle School students could use variables to set the number of sides and set the color to use based on a random number. Check out our Shapes Studio to see student examples.

All About Me
Who hasn’t done an All About Me poster or writing assignment with students? I know I have done these in PowerPoint and in Word. Why not let the students program something about themselves. That’s exactly what my 2nd-4th grade students did with their All About Me projects. This was completed right at the end of the year and unfortunately we ran out of time but I see great possibilities here. What about “All About” a main character in a book or a historical figure?

Games
I don’t know about you, but most of my students love video games. I love that Scratch lets them create their own games! This year, 6th grade ended the year by creating a game of their choice. They ran out of time but had a lot of fun and learned a lot about controlling sprites, keeping score, winning and losing games, etc. You can check out their games in our 6th Grade Scratch Studio – also in that studio are their Shapes projects and a 10-block Challenge Project where they had to create something using only 10 specific programming blocks.

Mission Projects
Every 4th grader in California does some kind of Mission Project. Each year in the Computer Lab, I use Mission Research to help teach students about not plagiarizing and how to credit sources, etc. This year, I decided to expand on that and my 4th graders created a project in Scratch about their missions. Scratch could be used in almost any curricular area and I plan to have more grades do curriculum related projects next year. If you want to check out this year’s projects, head over to our 4th Grade Scratch Studio (which also has their Shapes and All About Me projects) to see them.

If you want to see all of the projects my students did this year in one place, check out our 2013-2014 Studio.

Do you see now why I love Scratch? The possibilities are endless!

You do have to have a log in to save work on the Scratch website and yes, you do need an email address to set this up. My students don’t have individual accounts – at least not for school; some of them do have accounts they have set up at home. I have a single account for the Computer Lab but you could easily have one per class or one per grade, for example. At this point, you can have multiple computers logged in to the same account but my students actually work offline.

We have Scratch 1.4 installed on the computers in the lab and 2nd and 3rd grade have been using that version to create their projects. Next year, I will probably install the Scratch 2.0 offline editor rather than continuing to use version 1.4. For 4th grade and up, students just use the Create option on the Scratch website and Upload (open) and Download (save) their work to their computer in the lab. This is a great teaching moment about why it’s “upload” to open your work and “download” to save your work. When a project is finished then I log in and let the student save their work to the class account. The big thing missing when working offline is the backpack but the few times we have needed this, I just log the student in and when they’re done using the backpack, have them log out again. If you want more details on this, check out my Using Scratch With Class Login Instructable.

Now back to that if I could only use one thing. Yes, it would be Scratch but Scratch isn’t perfect. What is?

  • Scratch isn’t good for students who aren’t reading yet. Scratch, Jr. is scheduled to be released soon but it’s going to be an iPad app which won’t work in our lab.
  • It’s been another teaching moment to have 2nd and 3rd graders use Word to write their text for Scratch so they can fix spelling errors and then use Copy and Paste (must be CTRL+V in Scratch) to move the text into their Scratch project. It would be nice to be able to have spell check built into Scratch to avoid that though.
  • I love the way that the activities at Code.org let you see the code you are writing when you use their block programming environment. This would be awesome in Scratch and in my opinion, would create a truly great transition from block programming to a more traditional programming environment.

Luckily, I don’t have to use only one app/program/website to introduce Computer Science concepts and coding to my students. Even though I have many choices, Scratch will still be one of my primary choices!

Are you teaching coding to your students? What would be your ONE choice?